Photo guides
How to take photos of yourself when travelling alone
Solo trips leave you with hundreds of photos of places and almost none of you in them. Here's how to change that without carrying a tripod everywhere.
The short version
- Ask someone who's already taking photos, and offer to take theirs first.
- Show them a photo you like and say where your head and feet go.
- When nobody's around, prop your phone at waist height and use the 10 second timer.
- Go early. Popular spots are empty, and the light is softer.
- Stand to one side so the place is in the photo too, not hidden behind you.
There are two ways to get yourself in the photo on a solo trip. You ask someone, or you set the phone up and use the timer. Asking is faster and works almost anywhere, as long as you know who to ask and what to tell them. The timer is the fallback for quiet spots and early mornings.
Who to ask
The best person to ask is someone who's already taking photos: a couple photographing each other, a friend group, someone with a decent camera round their neck. They know what they're doing, they're standing still, and they usually want a photo of themselves too. Offer to take theirs first. Most people say yes straight away and then return the favour without being asked.
Cafe and hotel staff are good to ask when it's quiet. Avoid people who are clearly on their way somewhere, and be wary of anyone who walks up and offers to take your photo unprompted at a busy landmark. Hand your phone to someone you picked, and stay close enough to keep an eye on it.
What to tell them
Most strangers will put your face in the middle of the screen, step in too close and take one photo. You can head off all three in about fifteen seconds.
- Show them a photo you like on your phone before you hand it over, so they can see the kind of shot you want.
- Give them two landmarks: "top of my head on the top line, feet at the bottom." Turn the grid on first (Settings, then Camera, then Grid) so the line is there to aim at.
- Ask for a few: "could you take a few? I'll move around a bit."
Then check the first photo. If it's off, give one correction and go again. People are happy to have a second go when you ask nicely, and much less happy with a long list.
Put yourself to one side of the place
Standing dead centre in front of a landmark hides the middle of it behind you. Stand a little to the left or right so the thing you travelled to see is next to you in the photo, not behind your head. On the iPhone grid, standing on one of the vertical lines works well.
For a tall building or monument, a mid body shot (cut at the waist) usually works better than full body. You fill less of the frame, so more of the place fits above and beside you. For a wide view like a beach, a balcony or a valley, full body with plenty of space around you tells the story better.
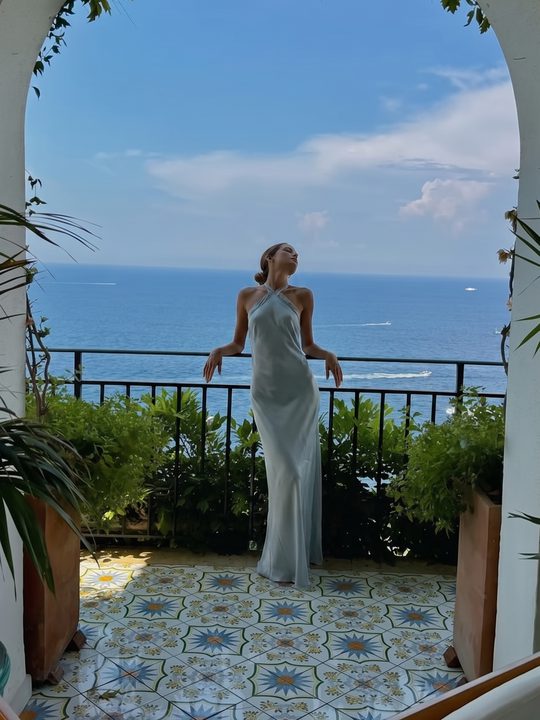

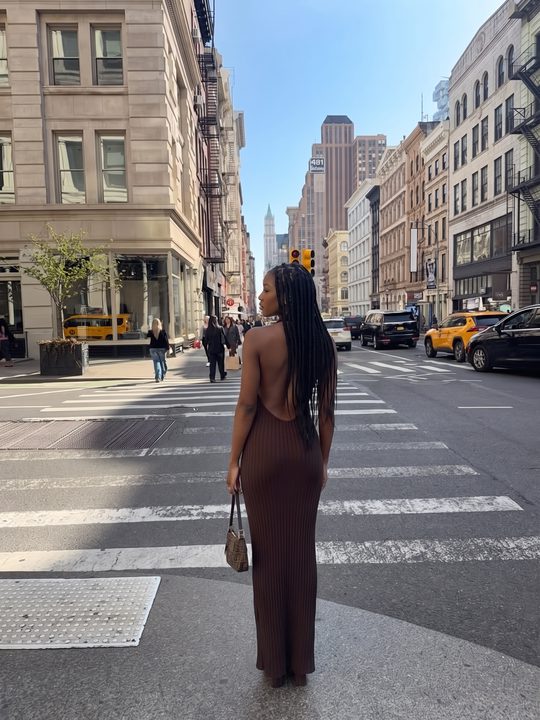
Full body for wide views, mid body when the place behind you is tall.
When there's nobody around: the timer
Early mornings, hiking trails and quiet beaches often have nobody to ask. Prop your phone upright at about your waist height on a wall, bench, rock or your bag, stand about two metres away, and use the 10 second timer from the camera controls. Keep the phone level and pointing straight at you, not tilted.
We cover the setup step by step in how to take full body pictures of yourself. If you'll be doing this a lot, a small travel tripod with a Bluetooth remote is worth packing. An Apple Watch works as a remote too, and it shows you the frame on your wrist.
Go early
The most photographed places are emptiest in the first hour after sunrise. You'll have the background to yourself, there's time to set up a timer shot without anyone walking through it, and the light is softer than at midday. Even an hour before the crowds arrive makes a big difference.
Take the photos while you're there
It's easy to tell yourself you'll get a photo later, on the way back or on the last day. On a solo trip that photo often never happens. When you're somewhere you love and the light is good, ask someone then.
Getting a good photo from a stranger, every time
The weak point is the handover. You can explain the framing you want, but once they're holding the phone, you can't see what they see, and they can't hear you from across a square.
Goodside handles that bit. You choose the framing before you hand over your phone: full body, mid body, seated, one of 127 ready-made framings set in places like beaches, hotels and city streets, or a photo of your own. They see two marks on the screen, "Top of head" and where the photo ends, line you up and tap the shutter. The only instruction they need is "line me up with the marks", and your photos never leave your phone.